
It is now so much easier than ever before to become an amateur photographer. Instagram, the quality of the phone cameras, apps that make even the lousiest images look HOT! Everyone has access to tools to become somewhat of a photographer. Despite all of these tools there is a big difference between shooting images for personal art and shooting product photos, such as crafts, for retail. Shooting good craft photography is a whole different approach.
There are a lot of tips on taking great produce photos on the internet. Most of the tutorials I have seen are by ETSY sellers and crafters that have shot a lot of product. And while I agree with most of their information, as a former art director, I have to disagree with some of their tips.
Okay, first a little background on me. I have overseen a lot of craft product and how-to photography when I worked at a major craft book publisher. 50 books, 150-200 shots a piece working with professional photographers. Sometimes I would hire stylists, but most of the time I styled it all myself because book budgets are TINY. All of the photos were heavily scrutinized, sometimes resulting in a reshoot to better suit the editorial focus, because the product changed, or just because. So, Fiberista, whether you are trying to shoot good images of your hand knits for that pattern you are writing, images for your ETSY listing of a new hat design, or that art yarn that you can;t wait to share with your Revelry group, here are what I consider the top 5 myths of shooting craft photography.
1. All good photos are created equal
Not all good photography is product selling photography. Your customer is not able to scrutinize your product in person, so your best bet is to give them as much visual information as possible. If you must have one beauty/mood shot, great. Do it. But then turn off the filters, turn on the lights and pull back so you customers can see your product. Get in close for good informational details (emphasis on informational). Do not be afraid to tweak the color in Photoshop to make them as true to actual as possible. This is not the place for the groovy filters Instagram. Think of the zoom feature on Zappos where you can see all the details of the shoes. That kind of info will make you customers way more confident about the product they are thinking about buying.
Moody, but filters are altering the true color and texture
Make sure there is a shot of the WHOLE product. Customers want to see exactly what they are buying.

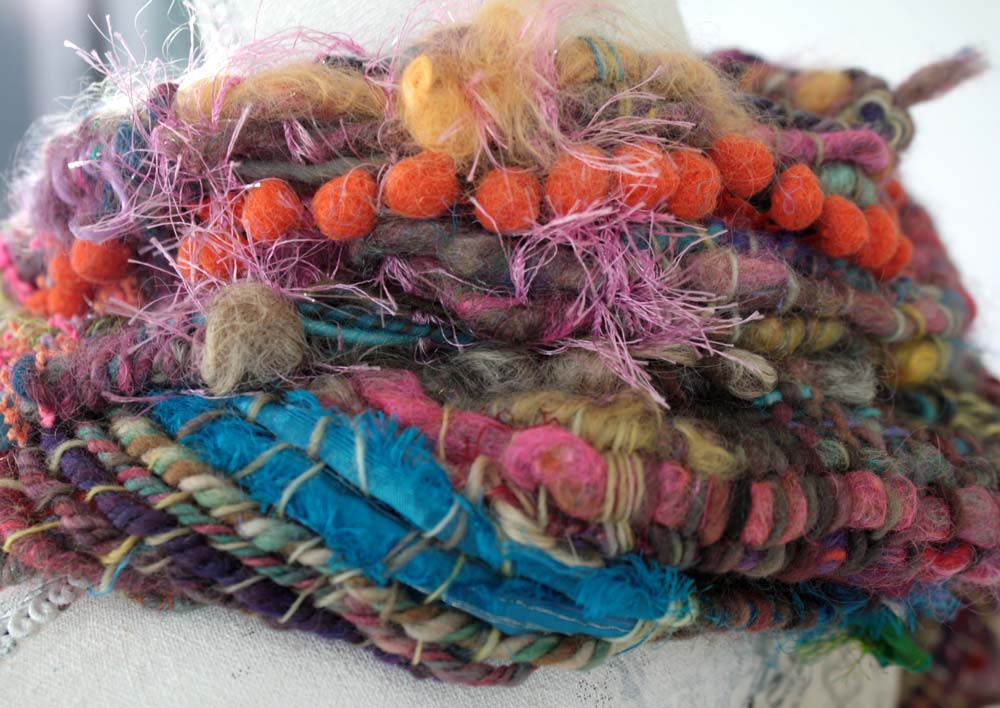
Close enough to see the softness.
2. The truth about natural light
I wish I had a dime for every post I have seen saying natural light is a must. I have even seen people delay shooting product for days because of it. While it is true, natural light for the most part gives accurate colors, awesome skin tones, and it is FREE! Natural light also changes. There are clouds. The sun moves. So if you are shooting a series, then the light will no doubt change throughout your shoot time. And solar flares can alter the colors of your product.
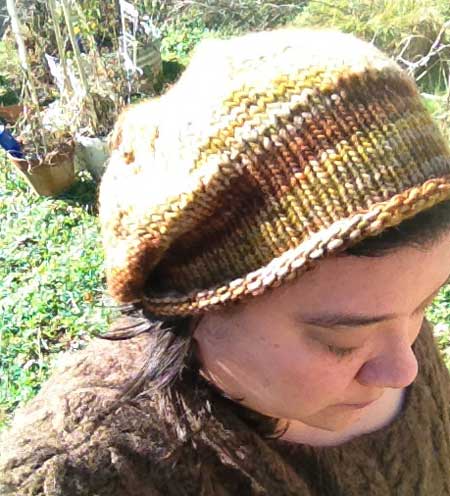
The solar flare is blowing out the color and texture of the hat.
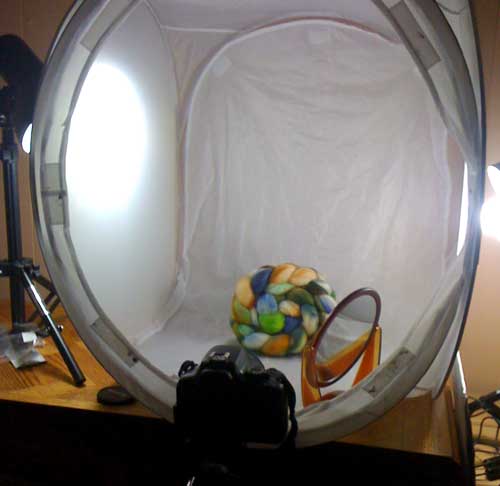
When we would have to shoot craft products outdoors, we would always supplement with artificial light to gain better control over the color accuracy on the products. But even so, when shooting outdoors, we were fighting against time because the natural light would change minute to minute, rendering light meter readings invalid. Don’t be afraid to shoot indoors. There are some awesome tutorials online for building a photography tent set up. Get some Ott lights or full spectrum bulbs. Do it. You will be glad you did.
Also white balance is your friend, use it. It is the best guarantee to get consistent color balance. When your business grows, you will be glad your shooting schedule is not at the mercy of the weather.
3. What are we selling here?
When shooting product photography, get rid of the props. Seriously. I know it is a beautiful cloth background, but is it more interesting than the product you are trying to sell? And why would you have yarn in a martini glass? If the prop is not natural to the product (not that I am opposed to martinis while knitting) then lose it. Keep the props out or to a minimum. Make sure the props do not compete and are relevant to the product.
4. Thinking beyond the image
It was the first mistake I made in my very first professional photo shoot for the marketing department of Southern Living. The photographer and I had spent an hour setting up a trade ad shot, making sure all the labels of product were visible. It looked good in the camera, looked great in the polaroid. The film came back, and I placed the scan into the layout and…crap. There was no room for bleeds without cropping into the product. There was no space for the copy overlay I had comped up for the ad. Yes an awesome picture, but not in terms of the intended use. I had to redesign the ad on the fly because of the limited cropping space. Every photographer I have worked with since then has heard me say “Great shot, but now let’s pull back 3 feet so I have some cropping room.”
Raw photo (file reduced to shorten load time…)
After cropping and color correction
ALWAYS give yourself more space around the edges. Pay attention if you want to overlay copy, you do not want the image to fight with the type. Use your cropping tools to tighten up your composition.
5. Tripods and shooting for the web
Okay, I am gonna get some flaming comments about this one. I sometimes find that my tripod is just not helping me get better shots. If it takes you 3 minutes to adjust your tripod for the shot that will be used only on the web (ie, you do not need a 300+dpi image that will be printed for publication), then lose the tripod. If I am listing 30 items and need a full product shot and 4 details, then I do not want to spend so much time readjusting the tripod (of course if you have a bunch of shots that can use the same camera position, then the tripod does make shooting go faster. I do not do detail shots of my roving, so the tripod speeds things along nicely) Even taking into account that people will want to zoom in to your image, chances are 1000px wide @ 72dpi will be plenty big enough to actually feel like they zoomed in. Yes you will need a pretty steady hand, but your hand will be steady enough if your lights are good and your shutter speed is fast enough. Play around with it. You may feel more comfortable with the tripod. Just know that because of the lower resolution of the web, it is not always necessary.
There. I said it. Save the art shots for your blog and instagram, focus on giving your customers good information. If you found this blog post helpful or have another tip you would like to share I would love to hear it. Leave a comment below.
 Fiber artist Stacey Budge-Kamison AKA UrbanGypZ lives and works in Cary NC. She can also be found knitting in public, hammering out her latest e-course at local cafés and spinning yarns in her booth at her favorite arts festivals. A designer at heart, Stacey has decided that her mission is to help fellow knitters, crocheters, weavers and felters embrace their own style and creativity by exploring fiber art as it is a part of their everyday life and helping them embrace the title of artist no matter where they are in their journey.


There is a lot of revelry on Ravelry. Thanks for myth busting fiber photography!
Thank you so very much for this post! As an amateur photographer & owner of a new business, this information is so very valuable since I was planning on doing most of the needed photography myself. I totally agree that, while the cool filters offer a nice “artsy” vision of the product, they really don’t tell you much in the end. For years I have avoided buying things on line that have some cool filter applied to the photo; I just don’t know what I’m buying, and I will have to foot the bill for return shipping if I don’t like it.